Showing posts with label prototyping. Show all posts

Tuesday, May 19, 2015

Prototypical Influence

There are mostly two things I remember vividly from presenting the first prototype of a certain game that has since fallen into oblivion. The first was how initial reservations of people who sat down to play it would change into all out enthusiasm by the end of the third or fourth turn. The second was the question that was seemingly asked by every other person who sat down to play: “Are you really allowed to use Magic layouts for your own game?”

Three stages of prototyping for Mistfall.
During the last two weeks I talked about making a prototype of your game, starting off with advising on what not to do when preparing a prototype for a potential publisher, and then sharing my own tips (part one and part two) on giving your game idea an actual shape in the real world. Before finishing off the practical advice series, I’d like to take a small detour to discuss one more aspect of prototyping, and that is how the form of your prototype influences the way your testers will react to it - and what you are probable to get for a basic or a "good looking" prototype.

I’ve already talked about why it is not the best idea to put in too much work into the art and graphic design part of your prototype. But aside from using up time that could be better spent on perfecting the actual game, there is also the matter of how your testers will perceive your prototype – and how willing they will be to share their ideas on it with you. 

Simply put, if your prototype looks like an almost finished game, chances are that some of your testers might doubt themselves more than your design. This may lead to them refraining from voicing their complaints or ideas, just because visually the game looks like a ready to go product. Obviously, this will influence only some people, but still, if you want more sincere responses, you should probably go with a more basic looking prototype.
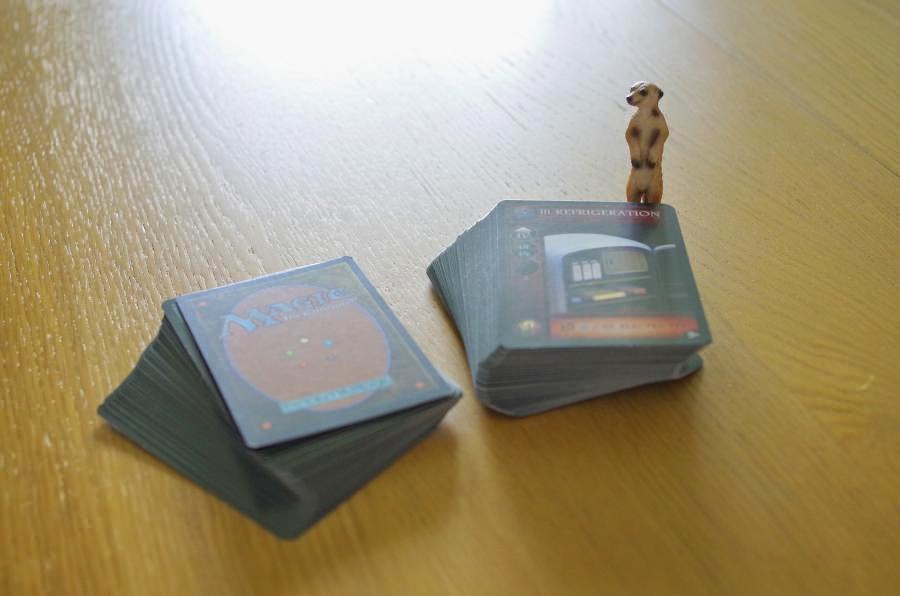
Here's some basic prototyping components, just for good measure.
On the other hand, building a serviceable but simple, very much “work in progress” prototype makes people more eager to actually share all their thoughts, as they receive a visual cue that what you gave them to play with can still be modified. When you're still running basic playability tests, it's generally better to have more to work with (and weigh out) than to falsely believe that your game is perfect. And some people might be easily convinced that something they would perceive as a flaw, is actually a feature, since the game looks "so completed".  

Now, if you’re still somewhat perplexed by the Magic story in the first paragraph, let me also elaborate on that. To make my life easier, I used a free editor with Magic: The Gathering layouts to create all the cards for the game. And although I would start each and every presentation with saying: “None of the components you see here, none of the artworks, no graphic design elements or symbols are final”, people would still ask me if this is really the layout I'm going with for the final game.

With that in mind, it’s probably good to remember that no matter what you say, the actual shape of your prototype will do more talking than your mouth. And for that reason, when you want actual criticism, show people a prototype that is as basic as humanly possible – and when you want some love for the game (maybe because the testing period is done), go with the almost-finished looking one. My experience tells me that it works almost every time.
__________________
FIND OUT MORE NSKN official website Facebook  | BGG
Follow us on Twitter: @NSKNGames

Tuesday, May 12, 2015

If you build it, they will come. Part 2: Boards, Tokens & Dice.


Last week I talked about making cards for your prototype. Continuing the topic of prototyping your game, I’d like to talk about tiles, tokens and dice – and of the importance of cannibalizing other games.
Some basic tools: box cutter, heavy duty scissors, paper glue.

1. Tiles and boards

Making tiles and boards can be as simple, or as complicated and time consuming as you want it to be. Depending on how much work you want to put into your prototype, and on the actual use of a given component, you may either use some cardboard and paper glue, or simply a thicker type of paper you can print directly on.
Mistfall Hero Charters getting ready to be glued on thick cardboard sheets.


Cutting out tiles from a large sheet may be problematic, and you will probably do well to first get a specialist knife (or a box cutter) and something to safely cut on (like a self healing mat). But you can also make your life much easier by using tiles from another game as a base. You can paste over them with your printouts, and possibly trim down to the proper size.
Prototype Praetor tiles, and prototype Mistfall tiles pasted on final Praetor tiles.

As for boards, you can use anything to make them thick – but you can also simply use thick paper for your prototype. Wargames have gone with “maps” instead of boards for years, so if you don’t have anything you could mount your prototype board on, simply don’t mount it. Just use some scotch tape to make sure that smaller pieces don’t separate during game (or print it on a large sheet), and you are good to go.
This Versailles board is here for one purpose only: it will become a prototype board for a new game.

2. Game Tokens

The simplest way to make tokens is not to make them at all. If you need money for your prototype, borrow some coin tokens from another game, or use poker chips. If you need different types of goods you will be trading with or exchanging for victory points, consider simply using wooden or plastic cubes (again, taken from another game or bough from a specialist store). I personally use different types of markers, from wooden disks and cubes, to glass beads and tiddlywinks. You might be surprised what you can find at the florist’s or at a craft store.
Prototype tokens for Praetor and Versailles made using tokens fro other games and trimmed down to size.

3. Custom dice

The easiest way to make custom dice is to find blank dice online, and then either print out and paste the custom faces – or simply use a permanent marker. The second option is not quite as good, as you will most probably be unable to reuse any dice later – unless you paste over what you wrote on them – or even tweak the dice for the current prototype.
Blank dice and some prototype dice made by pasting printouts.

If blank dice are not a viable option, you can also use regular dice to paste over. Although, I strongly recommend using big dice with unrounded corners, as it is much easier to paste on them: you simply cut out squares (instead of circles) and glue them to the die sides. Finally, if none of these options are available, or you need dice other than the standard six sided ones, you can always prepare cheat-sheets, which will translate any numbers from regular dice into specific symbol outcomes (or other numbers). Be aware though, that this option may negatively impact the comfort of playing your prototype.
If you have to use regular dice, choose ones that are least rounded on the corners.

Next time…

I will be talking about some more general tips and tricks, wrapping up my prototyping series. As always, if you have any questions (or there is something more you’d specifically want to know – or add), ask away! Till next time
__________________
FIND OUT MORE NSKN official website Facebook  | BGG
Follow us on Twitter: @NSKNGames

Thursday, May 7, 2015

If you build it, they will come. Part 1: Cards.


A few days ago I talked on the blog about what to and what not to do with your prototype before sending it to a publisher. This time, I’d like to take a step back and talk a little bit about how to actually make a prototype of your game – or at least give you a few useful tips on making some of the most popular components. With this in mind, let's talk about cards.

A lot of games have cards, either as an addition to the board, tokens, cubes and meeples, or as the “main attraction”. Regardless of how important and numerous cards are in your game, you really don’t want them simply printed on a piece of paper. So, unless you are using a professional printing service that focuses on cards, you need an easy way to make them at home – and here’s how you do that. 

1. Get some CCG cards.

Most of us gamers had at one point of our lives (or still have) something to do with a collectible, trading or living card game. Such an adventure usually leaves us with a boatload of old cards, ripe for being used in a prototype of our own game. And if you’ve never played a CCG, or have gotten rid of all your old cards, don’t worry, you can usually get packs of several hundred old cards off the internet for a few bucks (or your regional equivalent).

A stack of some CCG cards (Magic) and some CCG-sized Progress cards.

2. Get some sleeves 

Some people like to glue prototype printouts on cards. While the idea is not bad, it has a few downsides. One is that usually the stickers don’t take that well to shuffling. Another is that you will only be able to reuse one cards a few times, as after sticking two or three layers, it will simply become too thick to handle comfortably. By far the best way is to get card sleeves. Even the cheapest will do: you’ll just take a card and sleeve it together with the prototype printout, to create a card that is not only easy to shuffle, but also relatively resistant to some abuse.

Penny sleeves ready for prototyping.

Also, when you want to make critical corrections, you can just toss the old printout and replace it with a new one. Finally, if you’re working on a game with different decks and you need different backs, you may think about slightly more expansive sleeves with opaque, coloured backs. These will allow you to distinguish between different card types easily, and as an added bonus, they will also make you cards slightly stiffer and more durable than penny sleeves.

Different colour sleeves for different decks in your prototype.
 
3. Get some good scissors or a guillotine paper cutter 

This is as simple as can be: if you’re planning on doing a lot of cutting, getting good (preferably long) scissors will make your job a lot easier. Adding a guillotine to your prototype workbench might also be a good idea, although if you’re not planning to assemble cards by the hundreds, long scissors will probably suffice.

My own scissors of choice: long and longer.

4. Use helpful software 

The internet is full of helpful software that is either free, and that allows you to quickly build and print CCG cards. A quick internet search will undoubtedly point you in the right direction. You can also quite as easily use your word processor to build a suitable table, that (after filling it with texts and symbols) can then be printed out and cut into separate cards. 

Rough prototype cards created using MS Word, CCG cards, a laser printer and a pair of scissors.

Different designers have various methods of making their prototypes. What I’ve shown you here is only what I consider most effective – and best fitting my work style. Still, some designers prefer to use business cards they write on by hand, or a professional card printing service (which is a great idea, but I’d advise it only when you know you won’t be making many changes to your cards), and what works for me may not exactly work for you.


Final Mistfall prototype - professional graphic design and printing, plus CCG cards and penny sleeves.

Next time I’ll talk a about tiles, tokens and the importance of cannibalizing other games. See you then!
__________________
FIND OUT MORE NSKN official website Facebook  | BGG
Follow us on Twitter: @NSKNGames

Tuesday, May 5, 2015

The thing with prototypes

I’ve recently heard that with specialist software and high quality printing services so widely available, there is no reason (and no excuse) for a prototype to look much worse than a finished game, and that designers should really make their prototypes look great to improve their chances of being published. Ladies and gentlemen, that is bad advice.

Image Source: BoardGameGeek

During the last few months at NSKN Games I’ve had some prototypes pass through my gaming table. Some of them looked really impressive, with “near final” artwork and graphic design. Some of them looked merely serviceable, with simple clipart or symbols representing different game elements. And we’ve both accepted and rejected games regardless of how lavishly or how simply their prototypes were produced. 

Now, I cannot speak for all publishers in the world, as maybe some of them will have a different approach to prototypes, but I’m still relatively certain that the following list of things you really don’t need to do (and a few things you most certainly do need to do) is one that will work with a lot of publishers. So, here we go: 

Do not overproduce your prototype. We will not be more impressed if you go with fancy stuff instead of simple stuff. We will honestly be looking at how your game plays, not at how your game presents itself on the table (in its prototype incarnation). Believe me when I say we’ve seen a lot of games, and we will be looking at mechanisms and ideas, not at shiny things. 

However, do make sure that your prototype is serviceable, easy to read and complete. Even the most lavishly produced copy will fail to engage us, if simply playing it seems the biggest challenge. So, make sure that we know which element is which, and that we can read what’s on them without a problem.

A simple but effective prototype.

Do not commission artwork or graphic design, unless you really know what you’re doing. If you don’t, you may end up with an expense that will never be covered, as the materials prepared may turn out to be unusable for the publisher you’ve chosen. And if you designed a Eurogame, it may also happen that it might be rethemed, which usually automatically means that none of what you’ve prepared will be in any way useful. 

However, do use the internet to help you with making your prototype more accessible. You can find caches of simple artworks and/or symbols, which you can download and use for your game. Some clean and simple icons or illustrations might make the experience of playing your game easier and more enjoyable for us. So, by all means, make your game look good, but don’t overdo it. 

Do not waste your time on unnecessary “improvements”. Unless you are an artist or a graphic designer, your job is to design a game – and nothing more. Spending months on making it look better will be a time wasted if you skimp on polishing the gameplay. Seriously, when it comes to production quality, we’ll have it covered. You just worry about making the game itself really cool. 

However, do make sure that what you send us is, well, neat. Some wear and tear is acceptable (it only goes to show that you’ve actually played your game), but be sure that none of the elements look like something we’d be afraid to touch without tweezers or latex gloves. Also, if some of them have more annotations than original content, you might want to redo them as well. 

The above tips cover the basics, and if you follow them, you should be fine. And if you would like to know how to actually make a prototype (as in: what materials to use and how to make your life easier), just reach out to us on Facebook or Twitter.

__________________
FIND OUT MORE NSKN official website Facebook  | BGG
Follow us on Twitter: @NSKNGames